Description
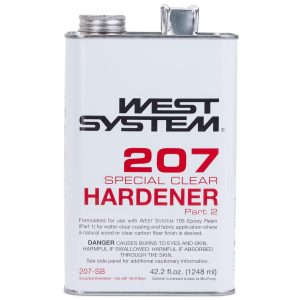
Mix Ratio: 3 parts resin : 1 part hardener
Pot life at 72°F (22°C): 20 to 26 minutes
Cure to a solid state: 10 to 15 hours
Cure to maximum strength: 4 to 7 days
Minimum recommended temperature: 60°F (16°C)
Clear Casting Table Tops with 207 Special Clear Hardener
Pouring a thick coating or casting onto a table top, bar or counter top creates a popular effect. 207 Special Clear Hardener is especially well suited to these applications. A ¼” thick coating of 105 Resin and 207 Hardener is deep enough to cast objects such as memorabilia into the epoxy for decorative accents. Here is what you need to know when casting a clear epoxy coat over flat surfaces.
Preparation for Casting 105 Epoxy Resin / 207 Special Clear Hardener
- Small, solid objects like coins, bottle caps, mosaic tiles, pebbles, guitar picks, buttons, seashells, and sea glass, are great choices for casting into a layer of epoxy.
- Photographs or postcards will darken and curl when wetted with the epoxy. To prevent this, first coat them with a craft decoupage glue like Mod Podge™.
- Porous materials such as burlap can trap a lot of air bubbles.
Before you get started, dam the perimeter of the surface you plan to coat. Duct tape around the bottom edge of the surface to prevent the epoxy from dripping. For coatings ¼” thick, tack a piece of stock molding with 6 mil plastic under it around the table’s perimeter. Make sure the surface is level and the temperature of the substrate is stable before pouring epoxy.
To prevent bubbles “outgassing” from the surface this, brush one or two thin coats of epoxy onto the surfaces. Allow this to reach gelation (about 6 hours at room temperature) before pouring epoxy. If you wait more than 18 hours before pouring your deeper layer of epoxy, be sure to sand the seal coating before pouring the epoxy mixture.
Pierce a hole in the bottom of a mixing pot. Cover this hole with duct tape. This will be your pouring vessel.
Pouring Epoxy
Warming the resin and hardener to about 80°F before dispensing will the epoxy’s viscosity, enhancing 207 Special Clear Hardener’s good flow characteristics. Epoxy resin and hardener cans may be safely warmed in a water bath. To reduce bubbling, seal the surface before pouring the deeper coating.
Mix the 105 Resin and 207 Special Clear Hardener thoroughly in the pierced and taped mixing cup. Allow this mixture to stand for about one minute to allow the bubbles time to reach the surface so the epoxy is deaerated. Peel back the duct tape covering the hole and allow this deaerated epoxy to flow onto the table surface. Pour close to the surface so the epoxy won’t splash and introduce air into the mixture. Stop the hole with tape when the container is nearly empty so bubbly epoxy isn’t poured onto the surface.
Limit the depth of the pour to ¼”. If a thicker layer is desired, allow the lower layer to set up before adding a new layer. Casting epoxy too thickly in a single pour, or casting more epoxy over a layer that has not set up can cause uncontrolled exotherm. This will ruin your project and could possibly destroy pieces of memorabilia you’ve placed in the casting.
Consider the temperature of your work area when deciding how deep to pour. At warmer ambient temperatures, the epoxy will cure faster and generate more heat. Again, limit the depth of each pour, especially when working in warm conditions.
Removing Bubbles from a casting before cure
A handheld propane torch or heat gun can be used to break the epoxy’s surface tension and help remove air bubbles. First, give the poured epoxy a couple of minutes to self-level. The bubbles should rise to the surface. Then move the heat source rapidly over the area (at roughly one foot per second) to avoid overheating the epoxy. You don’t want the heat source to make the epoxy gel or smoke.
A Beautiful Finish
Allow the final epoxy pour to cure for 24 hours before sanding the surface. When fully cured, the epoxy will sand to a dust. 105 Epoxy Resin with 207 Special Clear Hardener is compatible with many varnishes and polyurethanes. If your clear coated surface will be exposed to sunlight, add a topcoat of the UV protective varnish or a high-quality 2-part polyurethane.

