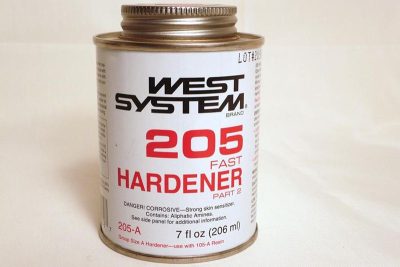
Description
Pot Life at 72F (22C): 9 to 12 minutes
Cures to a solid state: 6 to 8 hours
Cures to maximum strength: 1 to 4 days
Minimum recommended temperature: 40°F (4°C)
Choose 205 Fast Hardener for Cold-Weather Bonding
205 Fast Hardener is formulated to cure well at temperatures as low as 40°F (4°C). There are several things you can do to ensure a full cure when using epoxy in low temperatures.
Pre-Warm the Resin and Hardener
Cold temperatures increase an epoxy’s viscosity, making it harder to dispense, mix and apply. Warming resin and hardener reduces their viscosity so they flow easily through their dispensing pumps. To pre-warm, place the resin and hardener containers under a warming lamp or in a warm-water bath. Pre-warmed resins and hardeners will not cling as much to your mixing equipment. They’ll also blend more easily, ensuring thorough mixing. A warmer, lower-viscosity mixture flows smoothly during application and readily penetrates porous surfaces.
Dispensing and Mixing Epoxy in Cold Temperatures
- Always dispense 105 Resin and 205 Fast Hardener at the proper mixing ratio. Never alter the amount of hardener because this can seriously compromise the epoxy’s ultimate strength. WEST SYSTEM 300 Mini Pumps come ready to dispense the correct ratio of resin and hardener. One full pump-stroke of resin for every one full pump stroke of hardener is all you need to remember.
- Remember, cold epoxy resin and hardener are thicker and more difficult to pump. If you can’t pre-warm the resin and hardener, do not force the dispensing pumps up or down. Keep a steady pressure on each pump. Gradually make a full pump stroke downward, then let rise all the way up on its own. When working with cold epoxy, give the pump head much more time to return to the top of the stroke.
- Dispense the epoxy into a smaller diameter pot. This will increase the chemical reaction between resin and hardener. This is because a small pot has less surface area, which prevents heat from dissipating too quickly.
- Stir the resin and hardener thoroughly for at least 2 minutes in a small pot. Scrape the sides and bottom of the pot. Use a mixing stick shaped to reach the pot’s corners. Let the mixed epoxy sit in the pot a little longer before applying.
Preparing Surfaces
- Between applying coats of epoxy, prepare the cured epoxy surfaces. When coating at cold temperatures, the slower cure can result in a waxy/greasy film on the surface of the cured epoxy, called amine blush. Remove this byproduct of the curing process before you apply the next coat of epoxy. Amine blush is easy to wash away with plain water and a 3M Scotchbrite pad. Don’t let the water evaporate. Dry the surface with plain white paper towels. Don’t use rags, because they can contaminate the surface with laundry softeners and anti-cling ingredients.
- Finally, sand any remaining glossy areas with medium-grit sandpaper.
Allow the Epoxy Extra Time to Cure
- Allow the epoxy additional time to cure before you remove clamps or stress the joints. As a general rule, double the cure time for every 18°F (10°C) drop in temperature. Allow even more cure time when for bonding pre-stressed joints, bent laminations, or joints that will undergo high loads.
- Elevate the temperature of the partially cured epoxy. This can help the resin and hardener complete their cross-linking. It’s a good way to boost the epoxy’s physical properties, even after a week at cold temperatures.
- To prevent thermal shock, elevate the temperature of the epoxied surface gradually. Although any temperature increase will improve cross-linking, for best results, boost the temperature to 72°F (22°C) or warmer.
- Final cure time depends on the hardener speed and the temperature the epoxy is exposed to. Generally, higher temperatures require shorter cure times. When applying heat to cure epoxy, don’t exceed 140°F (60°C). Leave clamps in place until the epoxy has cooled.

